NSDF Dark Matter CLI
The NSDF Dark Matter CLI offers a pool of operations to access and download dark matter datasets. The CLI serves as a top level component in a workflow to download data which can
then be analyzed with the NSDF Dark Matter Library
🚀 Getting Started
Virtual Environment
To begin, make sure you have Python 3.10 or higher installed on your machine. You can download it from the official website: Install Python.
In this guide, we will be using uv to manage a virtual environment. You can install uv by following this installation guide.
Note
If you prefer, you can use a different environment manager such as conda or Python's built-in venv
Creating the environment
To create a new virtual environment, run the following command in your terminal:
uv (recommended)
uv venv darkmatter_cli_env --python 3.10
Conda
conda create -n darkmatter_cli_env python=3.10
Python venv
python -m venv darkmatter_cli_env
Activating the environment
Next, we activate the environment:
uv (recommended)
source darkmatter_cli_env/bin/activate
Conda
conda activate darkmatter_cli_env
Python venv
source darkmatter_cli_env/bin/activate
You should now see the environment name in your terminal prompt, indicating it’s active.
Installing the CLI
pip (recommended)
To install the CLI via pip, run the following command.
CLI pip installation
pip install nsdf-dark-matter-cli
From release
To install the CLI from releases, download the wheel file.
wget https://files.pythonhosted.org/packages/c5/6d/931b4a975cb7f259a2fa94942249577ca331ea669da2a15c5a017da14259/nsdf_dark_matter_cli-0.6.0-py3-none-any.whl
Now, we can install the CLI by passing the wheel file with the following command:
uv (recommended)
uv pip install nsdf_dark_matter_cli-0.6.0-py3-none-any.whl
Conda
pip install nsdf_dark_matter_cli-0.6.0-py3-none-any.whl
Python venv
pip install nsdf_dark_matter_cli-0.6.0-py3-none-any.whl
That's it! The CLI is now installed and ready to use. We can start working with it.
🖥️ The NSDF Dark Matter CLI
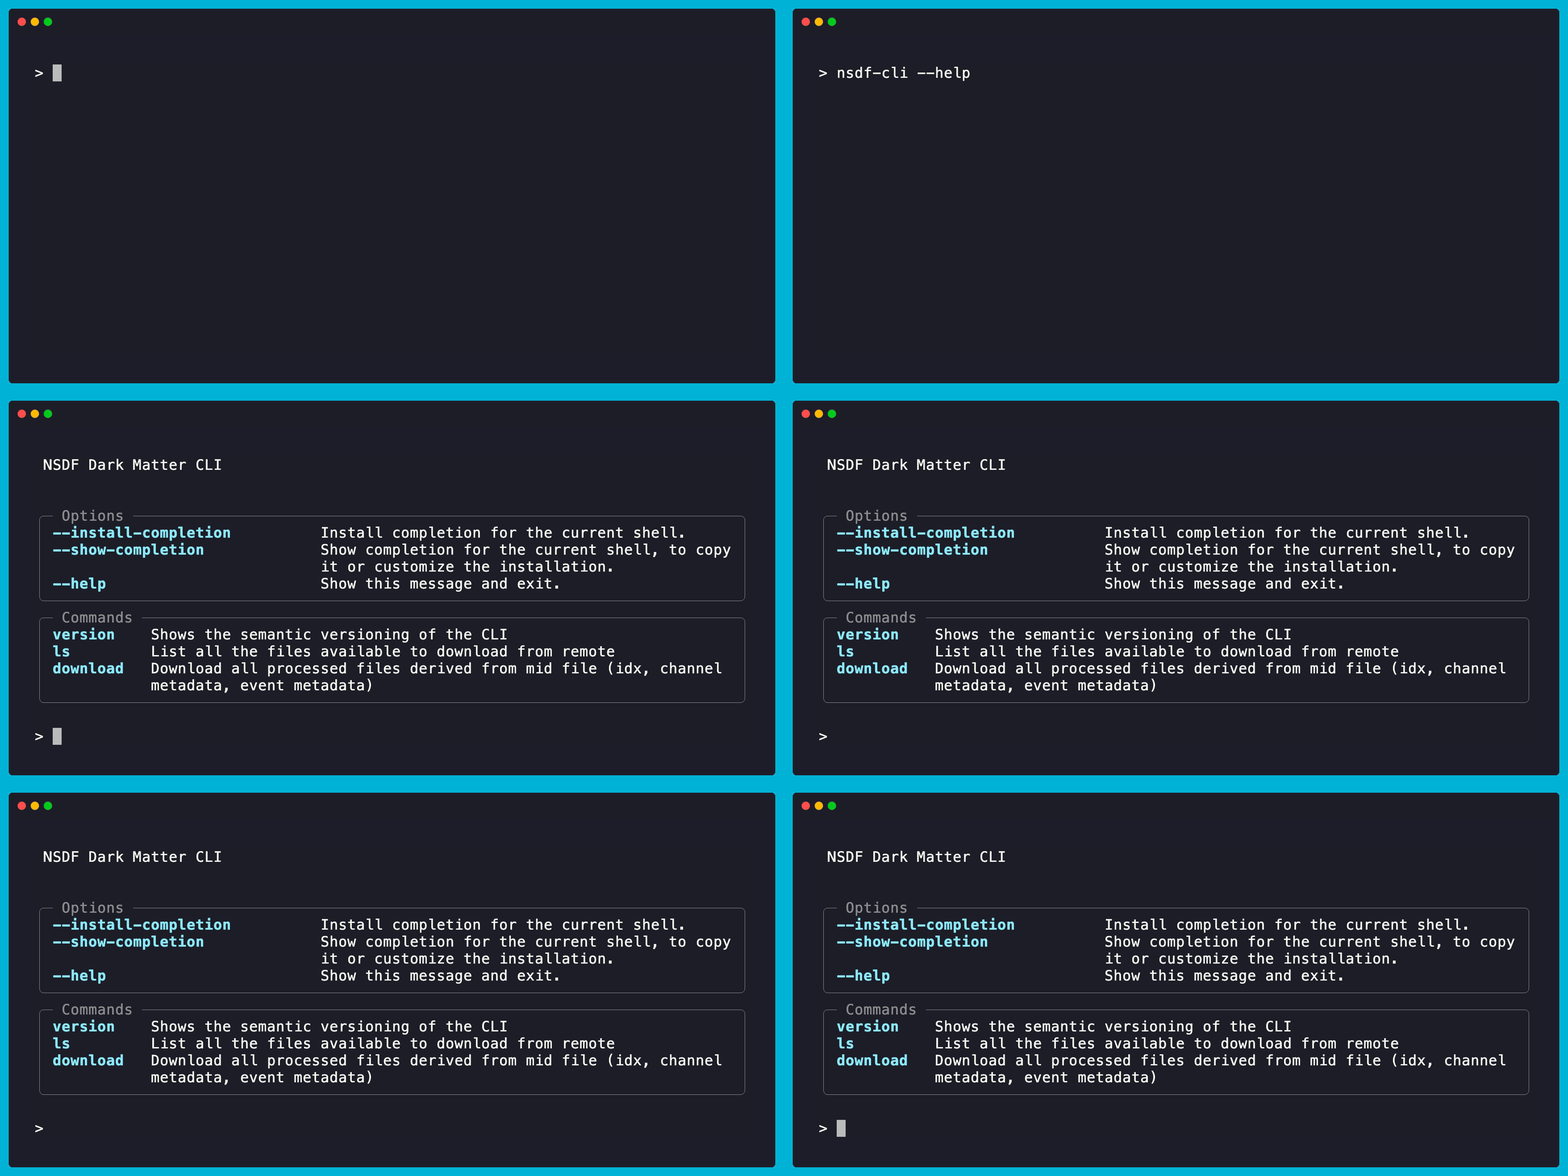
To explore all available CLI commands and options, run the following help command:
nsdf-cli --help
Managing global configuration
The CLI supports a global configuration to set defaults, such as the output directory and download endpoint. Use the config command to view or update these settings.
View current configuration
nsdf-cli config
This displays the current global output directory and global endpoint.
Set a global output directory
By default, idx files are downloaded to ./idx folder relative to where the command is run. This sets the directory where downloaded files are saved by default (overriding that location).
nsdf-cli config --output-global /path/to/output
You can also override the global output directory on a per-download basis using the -o flag:
nsdf-cli download 07180827_0000_F0001 -o /path/to/output
Set a global endpoint
nsdf-cli config --endpoint https://example.com
This changes the global endpoint from which the CLI downloads datasets. Use this if you need to point the CLI to a different data server.
Reset configuration
nsdf-cli config --reset
This resets all configuration values back to their defaults.
Listing remote files
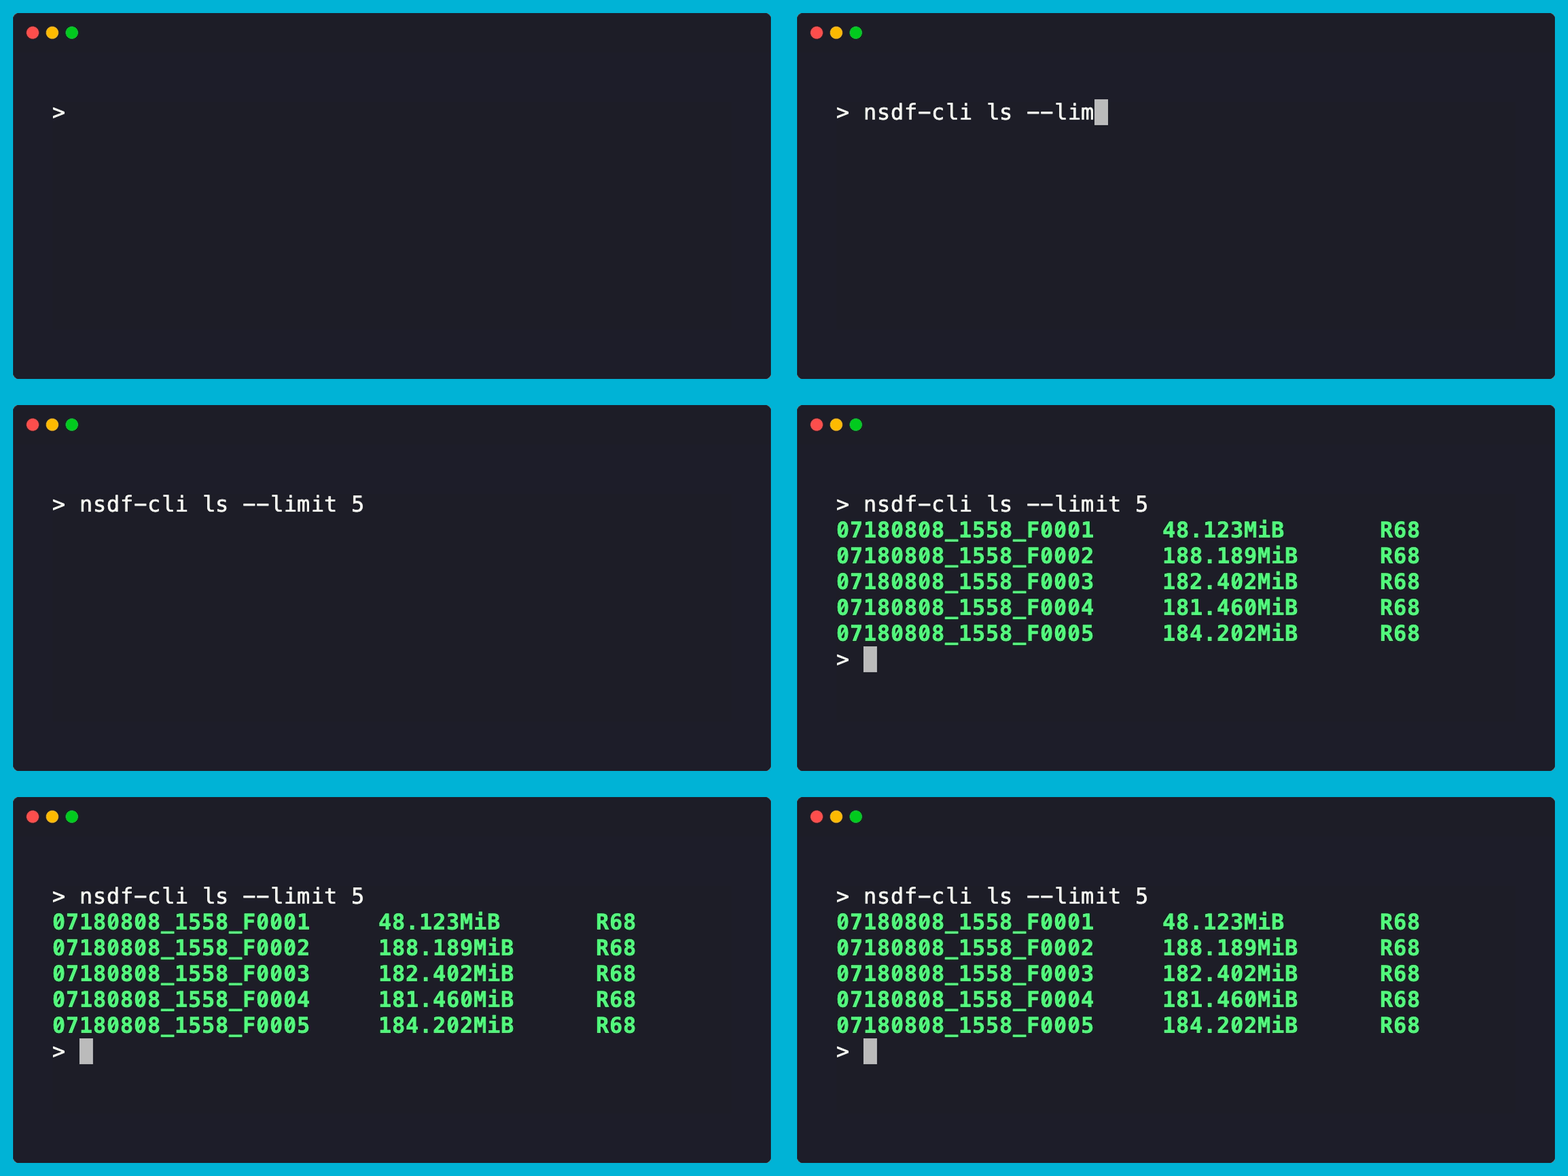
Want to know what files are available to download? Use the ls command to list them. You can also limit how many results you see by passing the --limit flag.
nsdf-cli ls --limit 5
Looking for something specific? Use the --prefix flag to filter files by name:
nsdf-cli ls --prefix 072 --limit 5
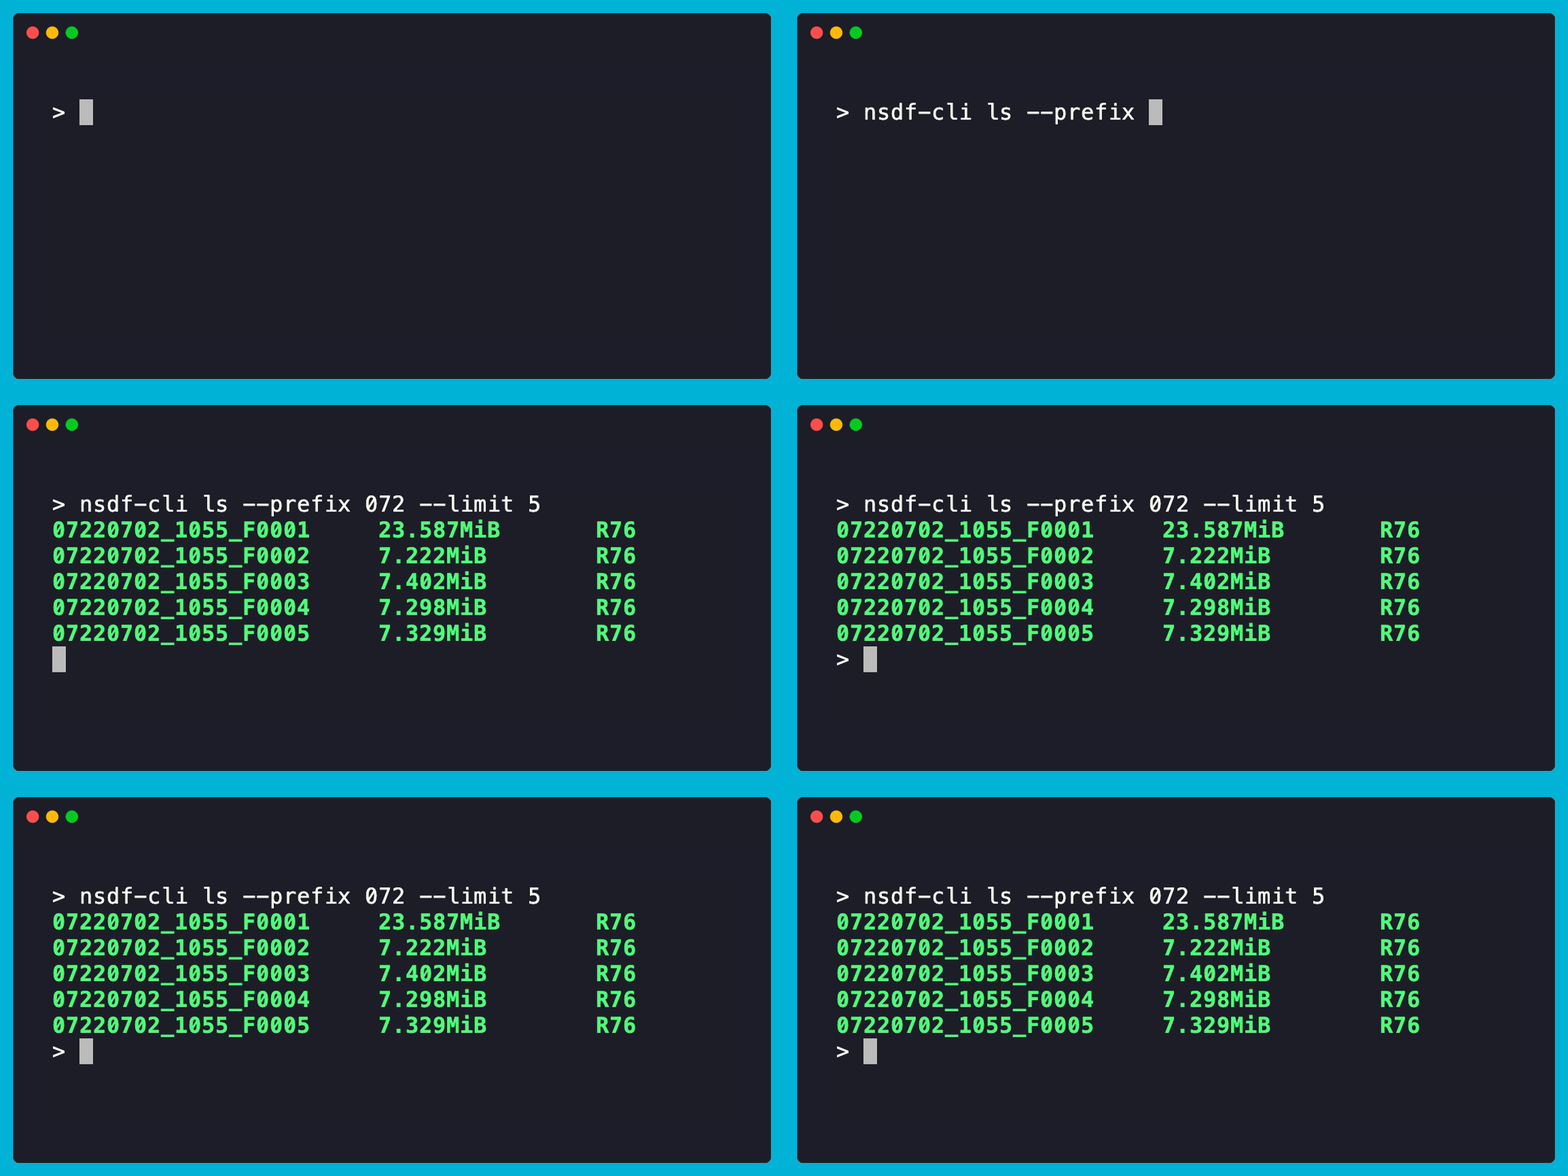
Great! we have found files from the R76 dataset.
Downloading datasets
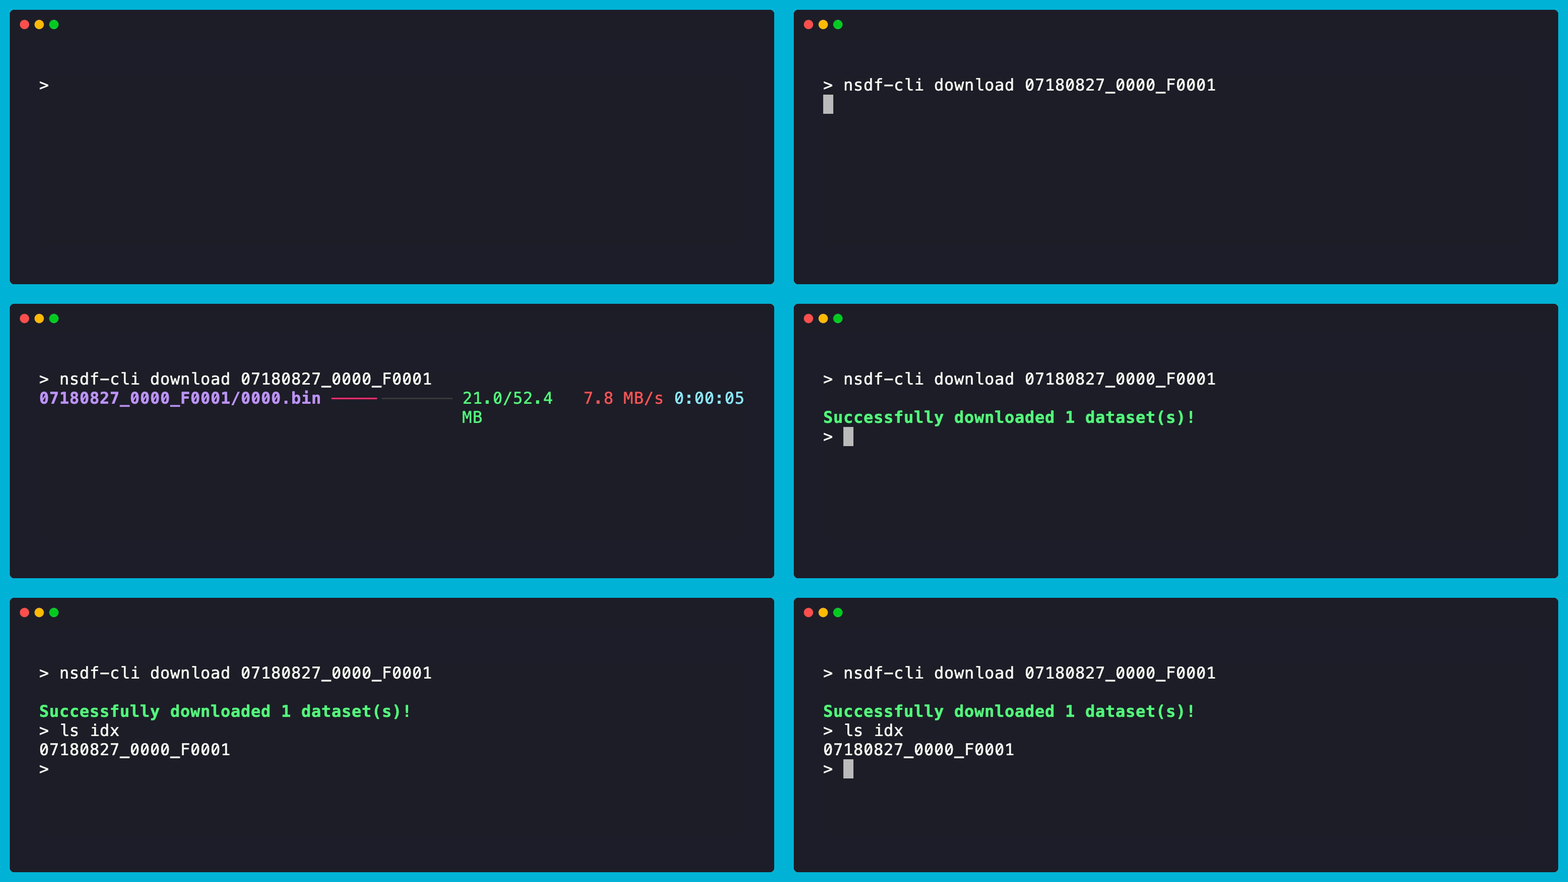
Once you've found the file you want, downloading it is easy with the download command:
nsdf-cli download 07180827_0000_F0001
Want every file that shares a prefix? Pass the --all (or -a) flag and give just the prefix:
nsdf-cli download 07180808_1558 --all
This downloads all matching files, e.g. 07180808_1558_F0001 through 07180808_1558_F0010.
You can also download a set of files at once by providing the -f flag:
nsdf-cli download -f files.txt
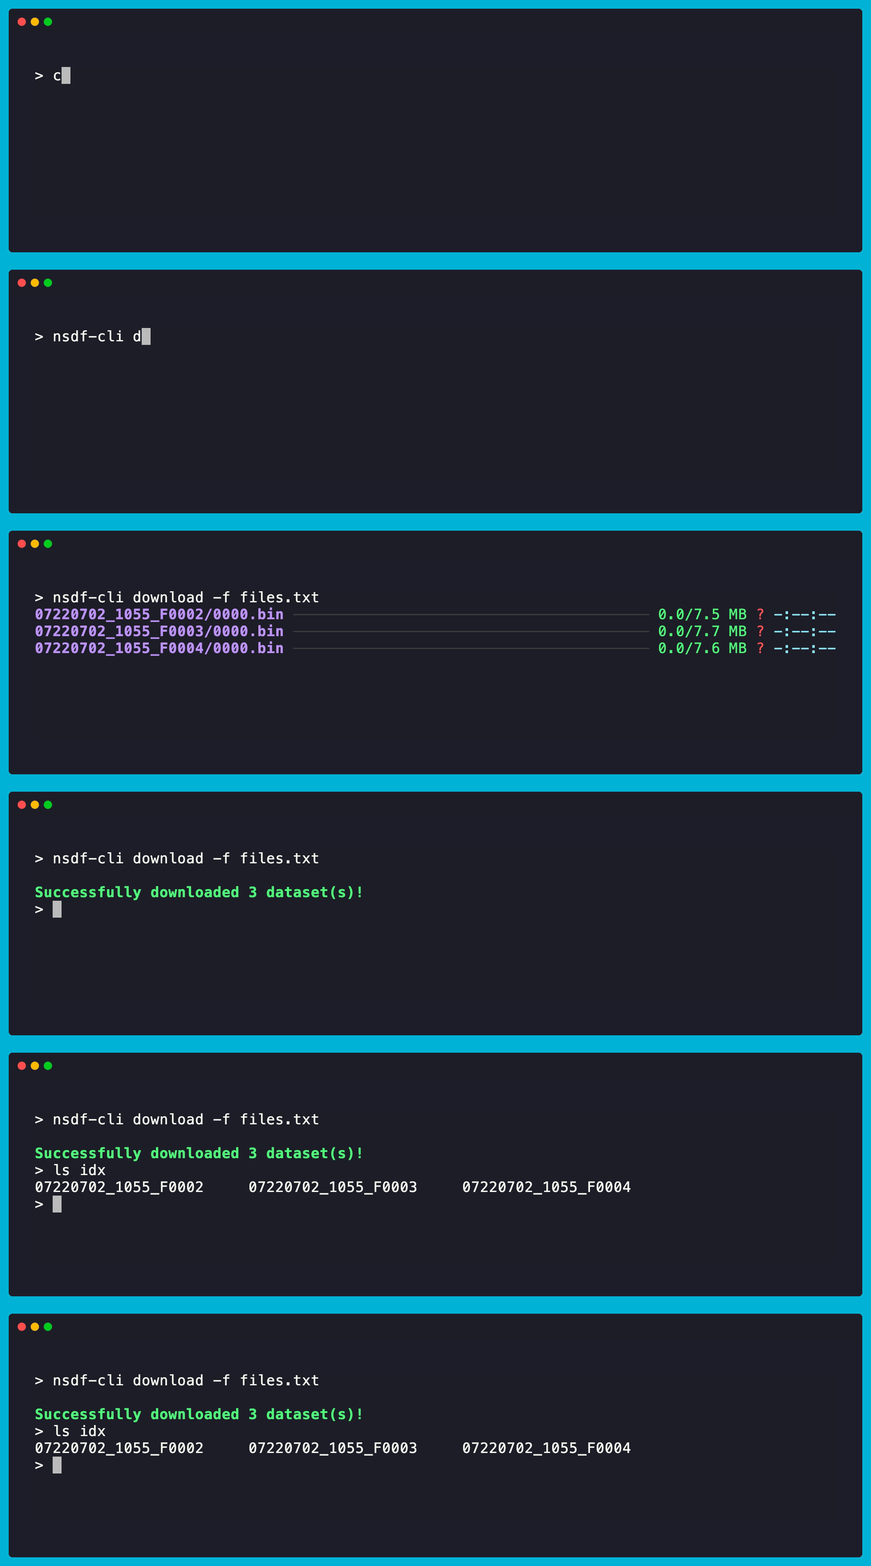
Downloaded files go into the output directory (by default ./idx, or the global output directory set via config), and each one gets its own subfolder based on the mid_id. After downloading a few datasets, your folder might look like this:
idx/
   |
   07180925_0000_F0001/
   |
   07181007_0000_F0001/
   |
   07180916_0000_F0002/
A mid_id directory is composed of the following files:
07180925_0000_F0001/
                   |
                   07180827_0000_F0001.csv
                   |
                   07180827_0000_F0001.txt
                   |
                   07180827_0000_F0001.idx
                   |
                   07180925_0000_F0001/
                                      |
                                      0000.bin
Pruning downloaded series
To remove all downloaded series from the global output directory:
nsdf-cli prune
To skip the confirmation prompt:
nsdf-cli prune --force
Next Steps
Now that you have some data, it’s time to dive into analysis! Head over to the NSDF Dark Matter Library guide to learn how to start working with the dataset.